![]()
make marketing affordable now!


| Adding forms into your documents is an advanced feature that requires both knowledge of HTML and access to a server that will process the data sent via the form. When used with Blink Mailer they are only really useful when making your subscriber forms which will be live on your website. Form ElementThe form element is a container for all form contents, which means that all form controls (for example checkboxes, text fields, or buttons) must be placed inside it. To insert the form into your document, press the Form toolbar button. The Form Properties dialog window that will open lets you configure basic form settings that control the form's interaction with the server. 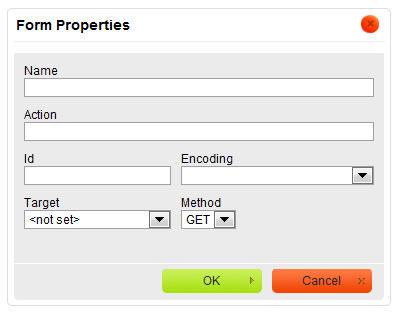
Form Properties dialog window in CKEditor
Once you configure the form and click the OK button, the form area will be visible in CKEditor editing area as a frame with a red dotted border. 
A form frame visible in the editing area of CKEditor
A form cannot be nested in another form or overlap with it, so you cannot start a new form inside the previous one.
|
|---|